Response Agent
The Response Agent helps you generate nuanced and compliant responses to inbound sales requests, RFPs, and questionnaires.
Response Flow Guide
The Response Agent offers a structured workflow to create professional, compliant responses for RFPs, questionnaires, and proposals.
Key Use Cases
The Response Agent excels at three primary tasks:
- RFP Draft Creation: Generate a 70-80% ready draft of an RFP response
- Bulk Question Answering: Respond to a long list of questions (questionnaires) all at once
- Document Structure: Create an outline or table of contents for an RFP, proposal, or document
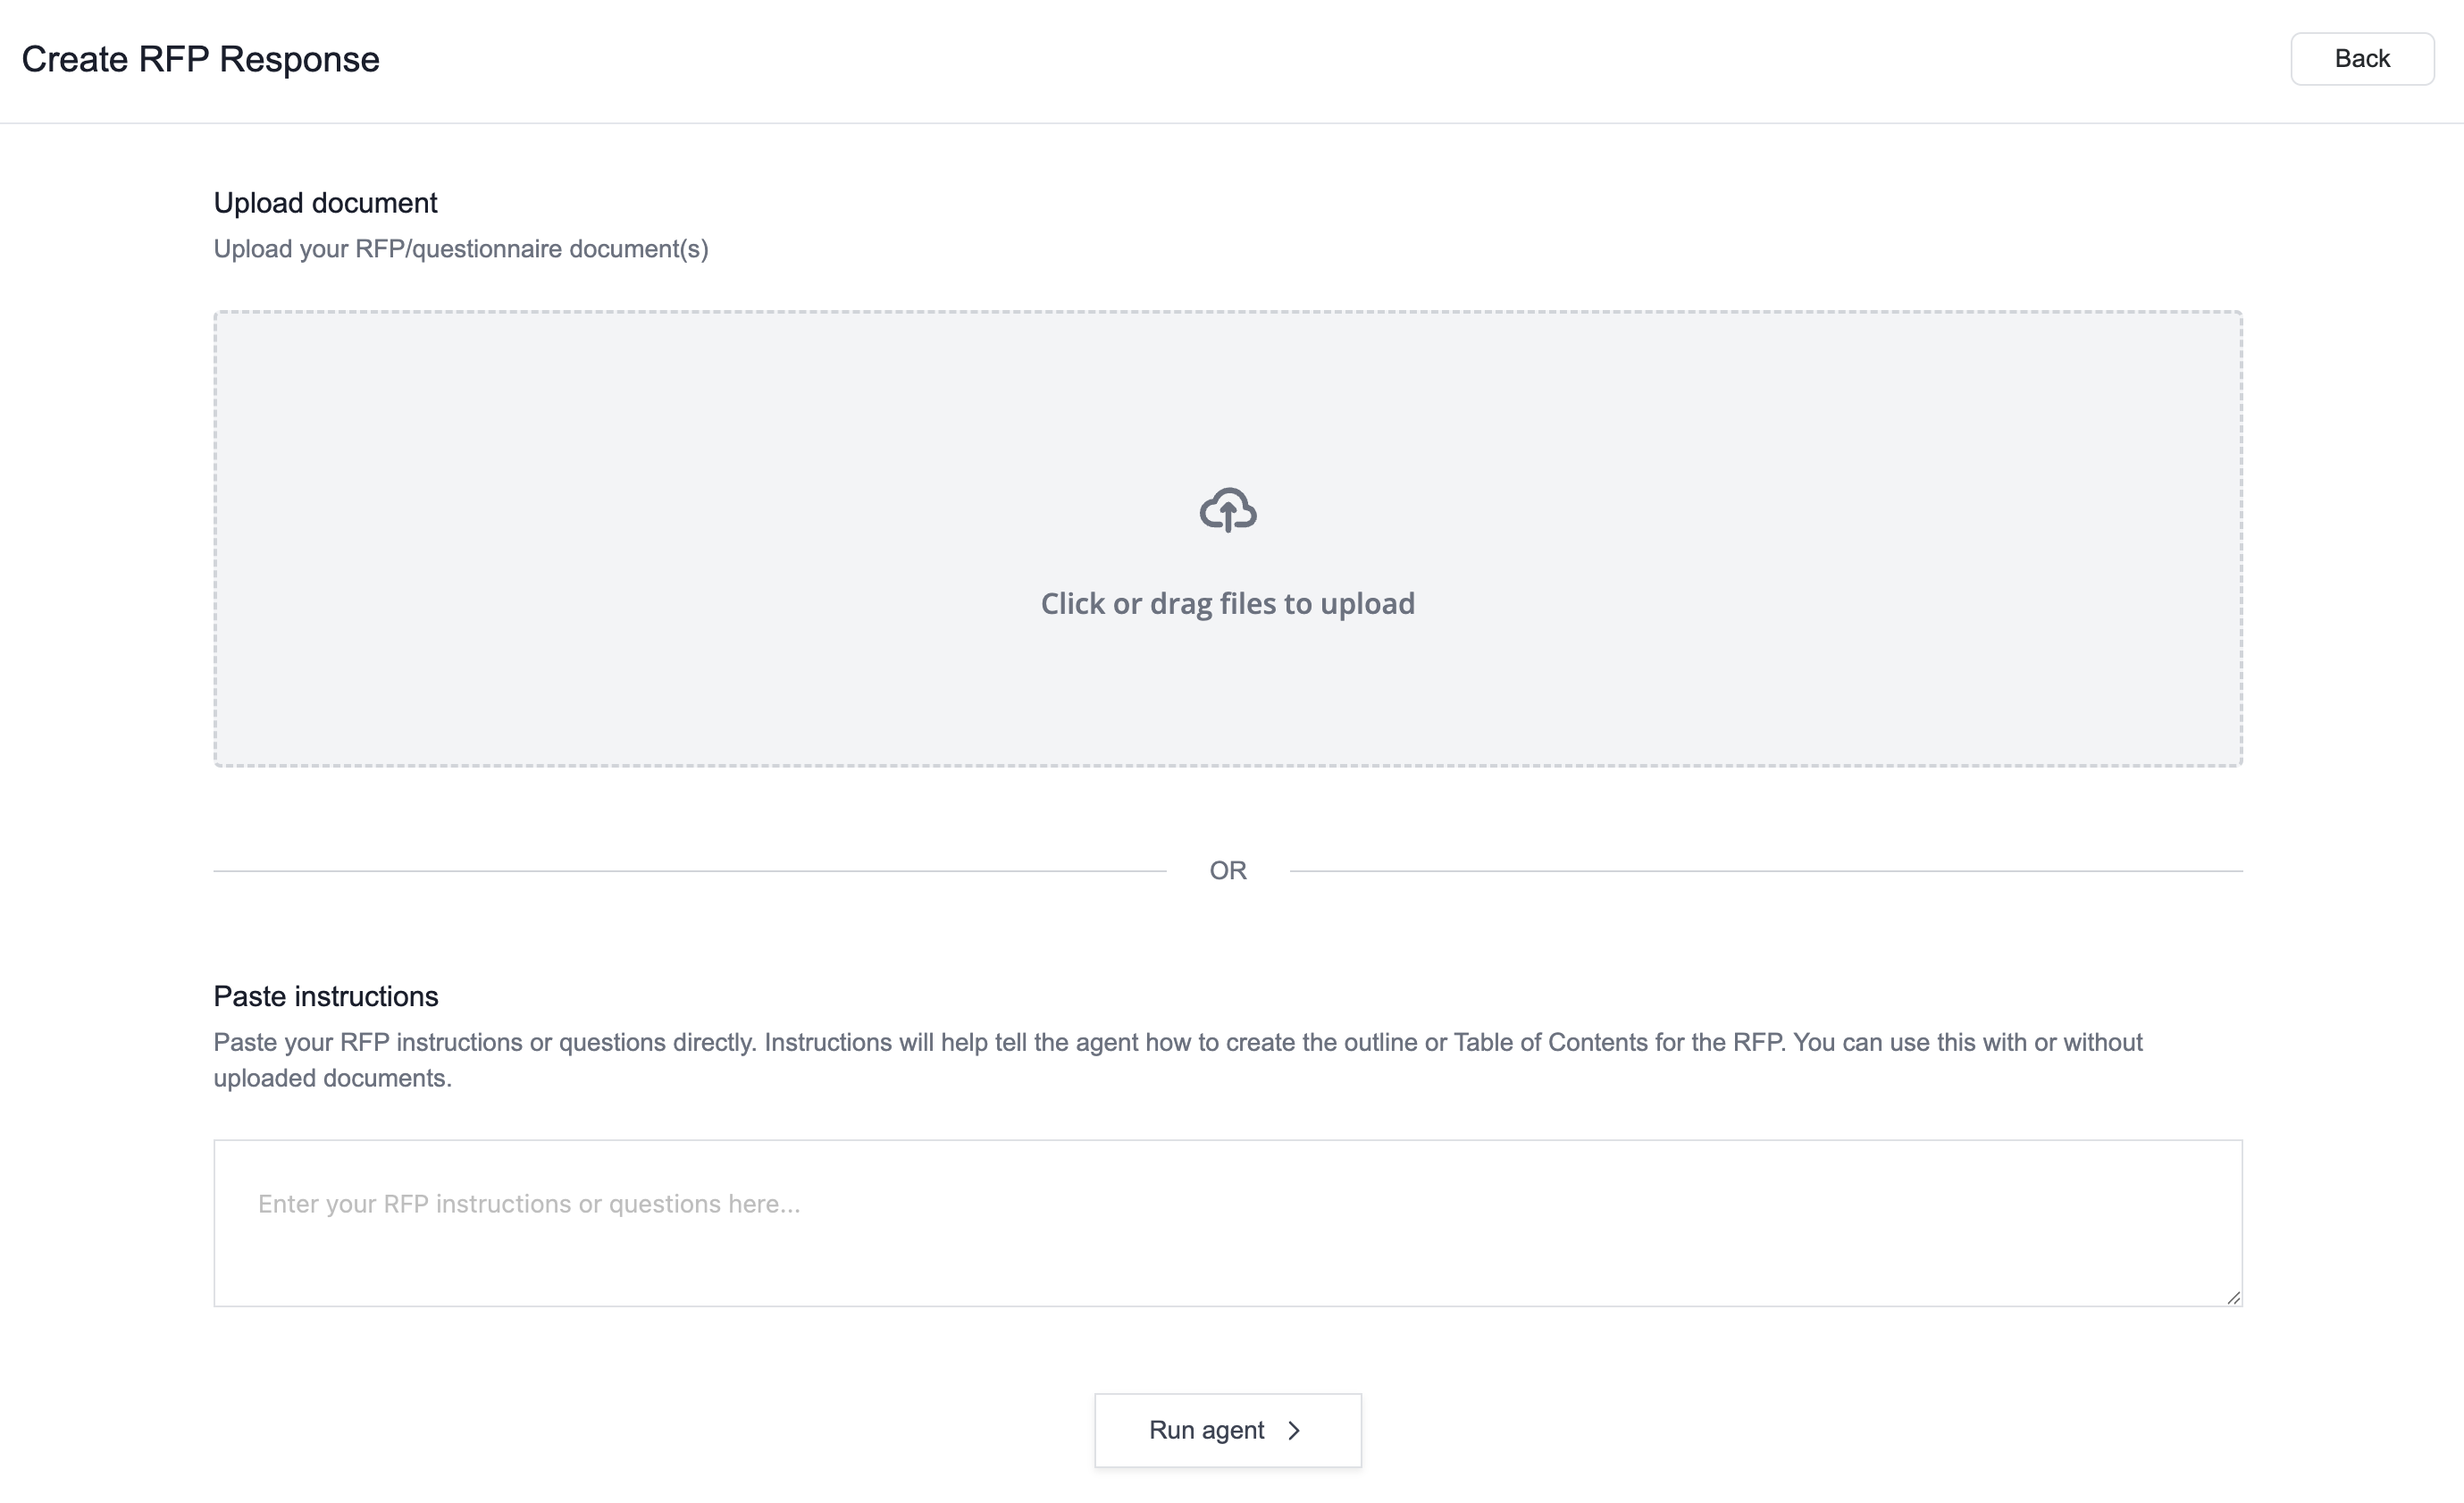
Step 1: File Upload + Adding Instructions
-
Getting Started: From the home page, click on the Response tile.
-
Upload Documents + Add Instructions: Upload your RFP documents, then add specific instructions for how you want the AI to approach the response.
-
Direct Question Entry: Paste a list of questions from an email or questionnaire without uploading documents.
-
Custom Requirements: Enter RFP requirements and guidelines for how you want the proposal structured.
The instructions you provide guide the AI in creating your outline and response structure. Be specific about your goals - whether you need a complete proposal draft, answers to multiple questions, or a structured outline.
Step 2: Running the Agent
Click "Run Agent" to generate an outline or table of contents for your proposal.

Each section in this outline becomes a "prompt" that the agent will use to generate content for that specific part of your response.
Step 3: Setting Global Instructions
Click "Settings" to access global instructions that will apply to every section of your response.
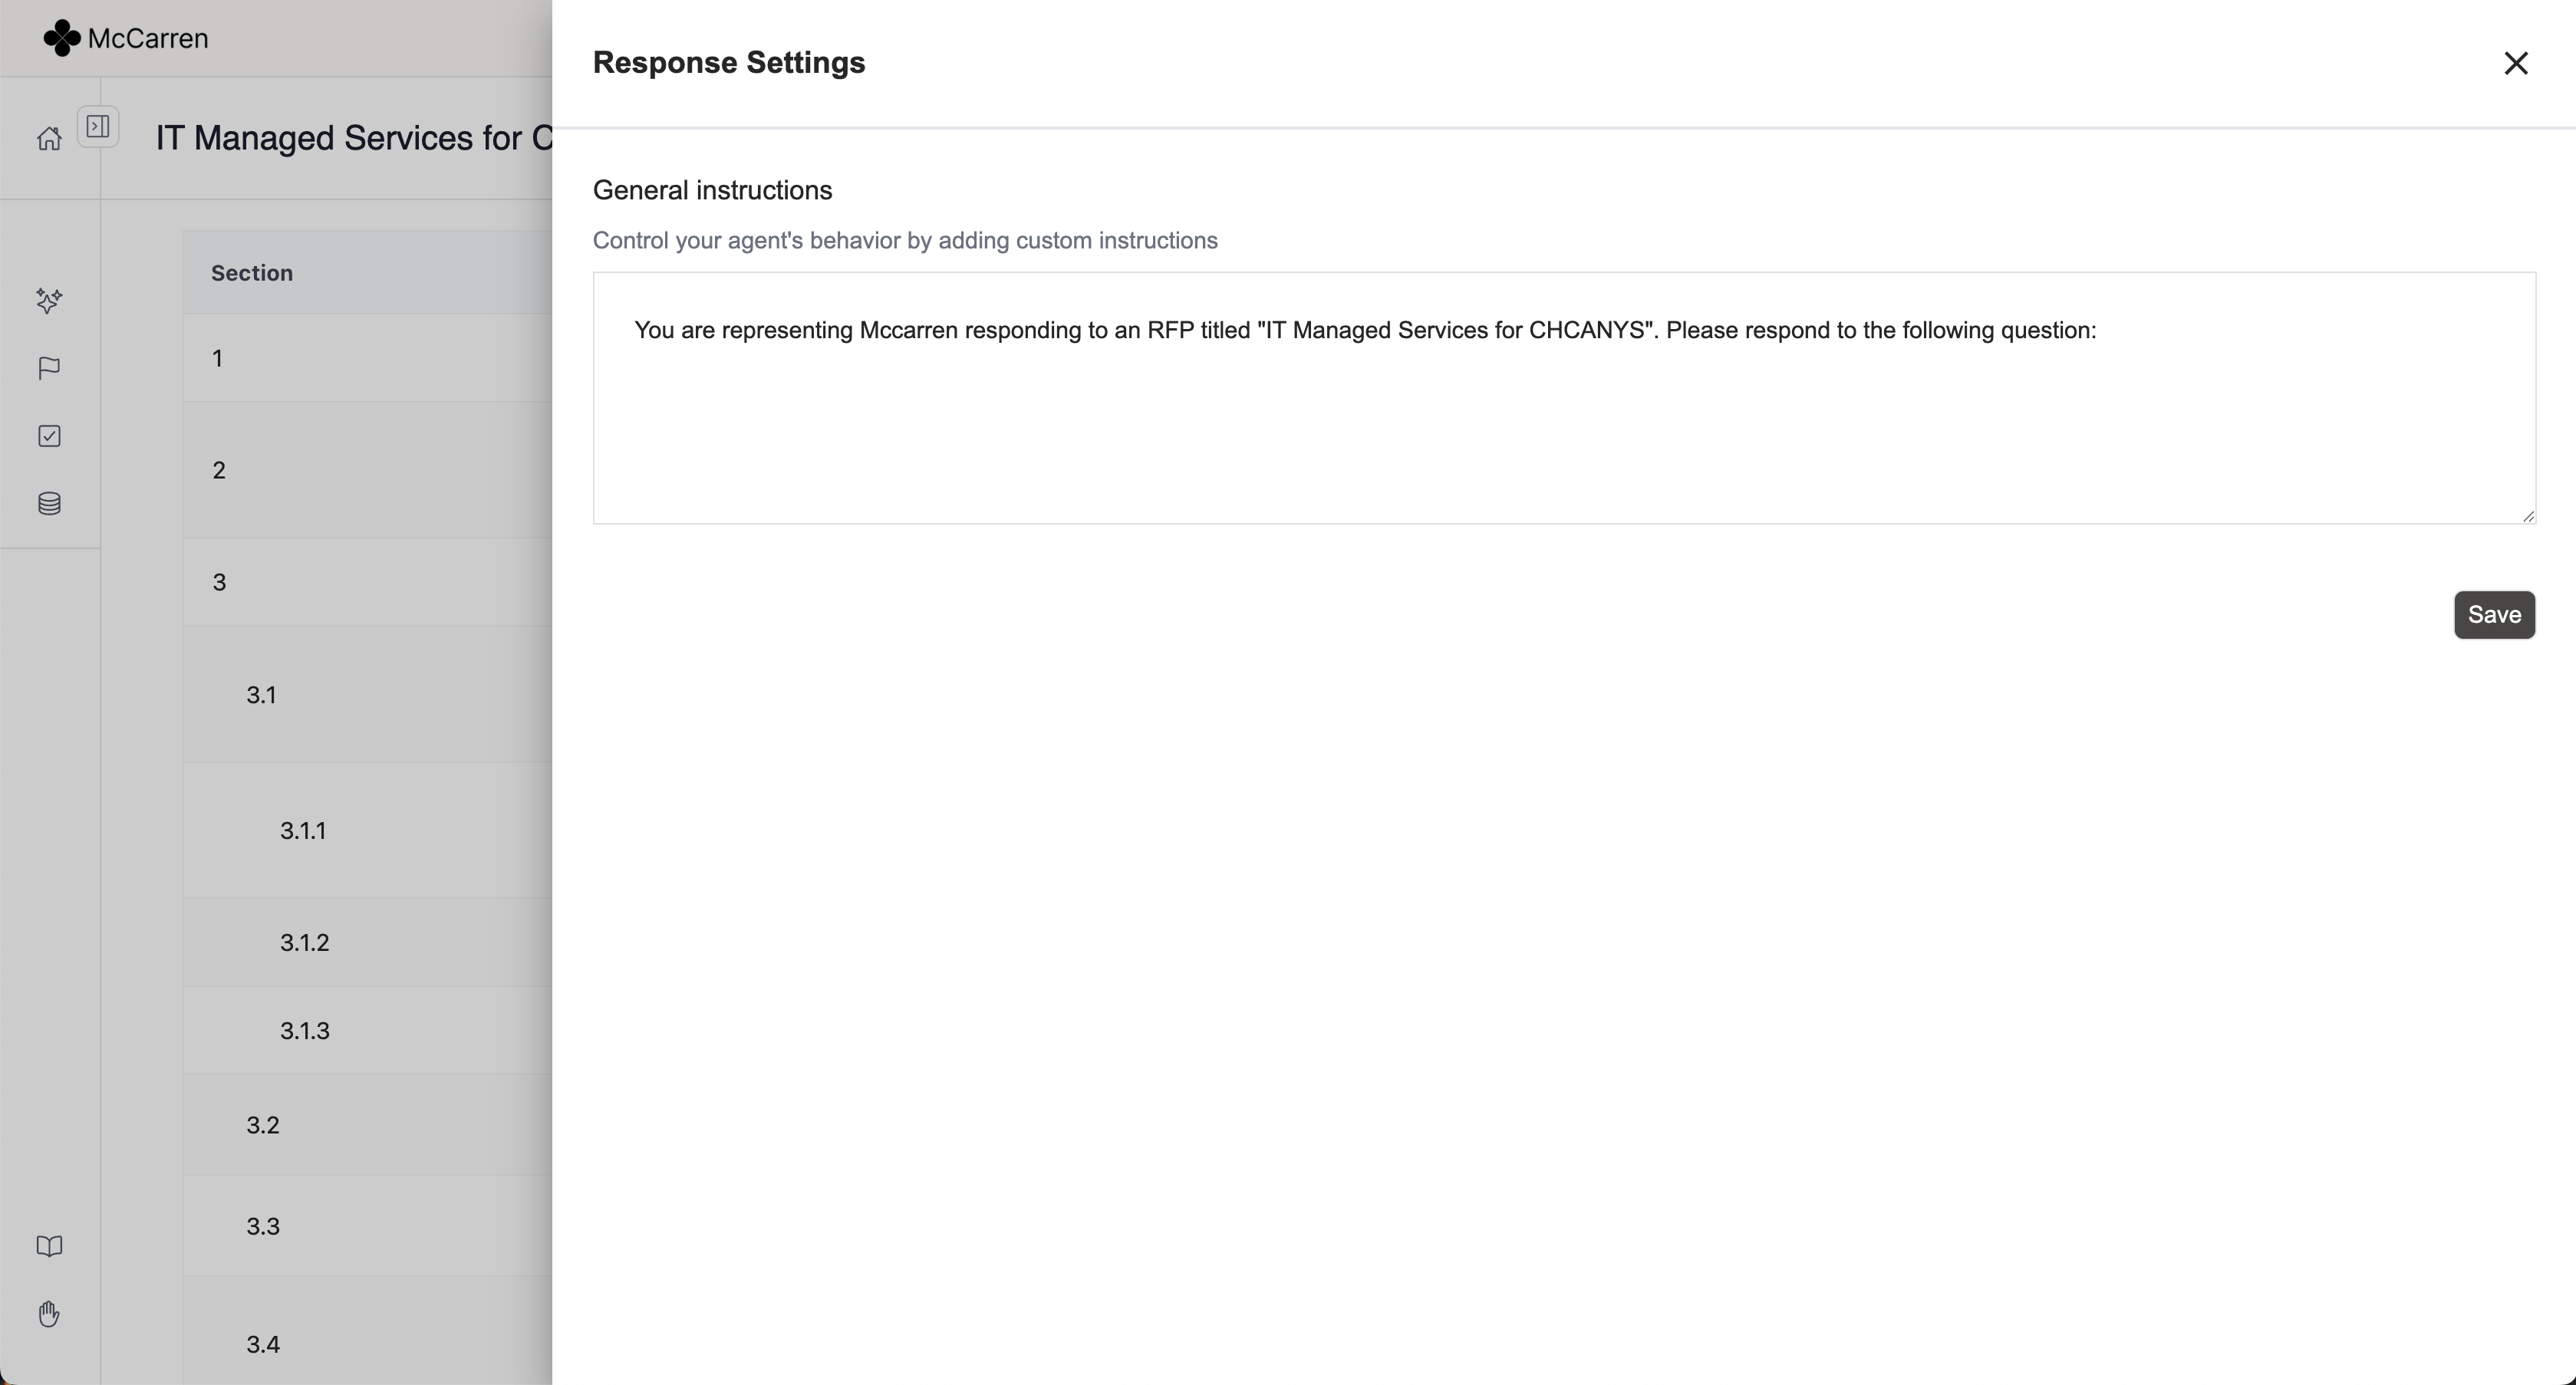
Here you can add:
- Win themes
- Company values
- Tone guidelines
- Any information you want to apply across the entire response
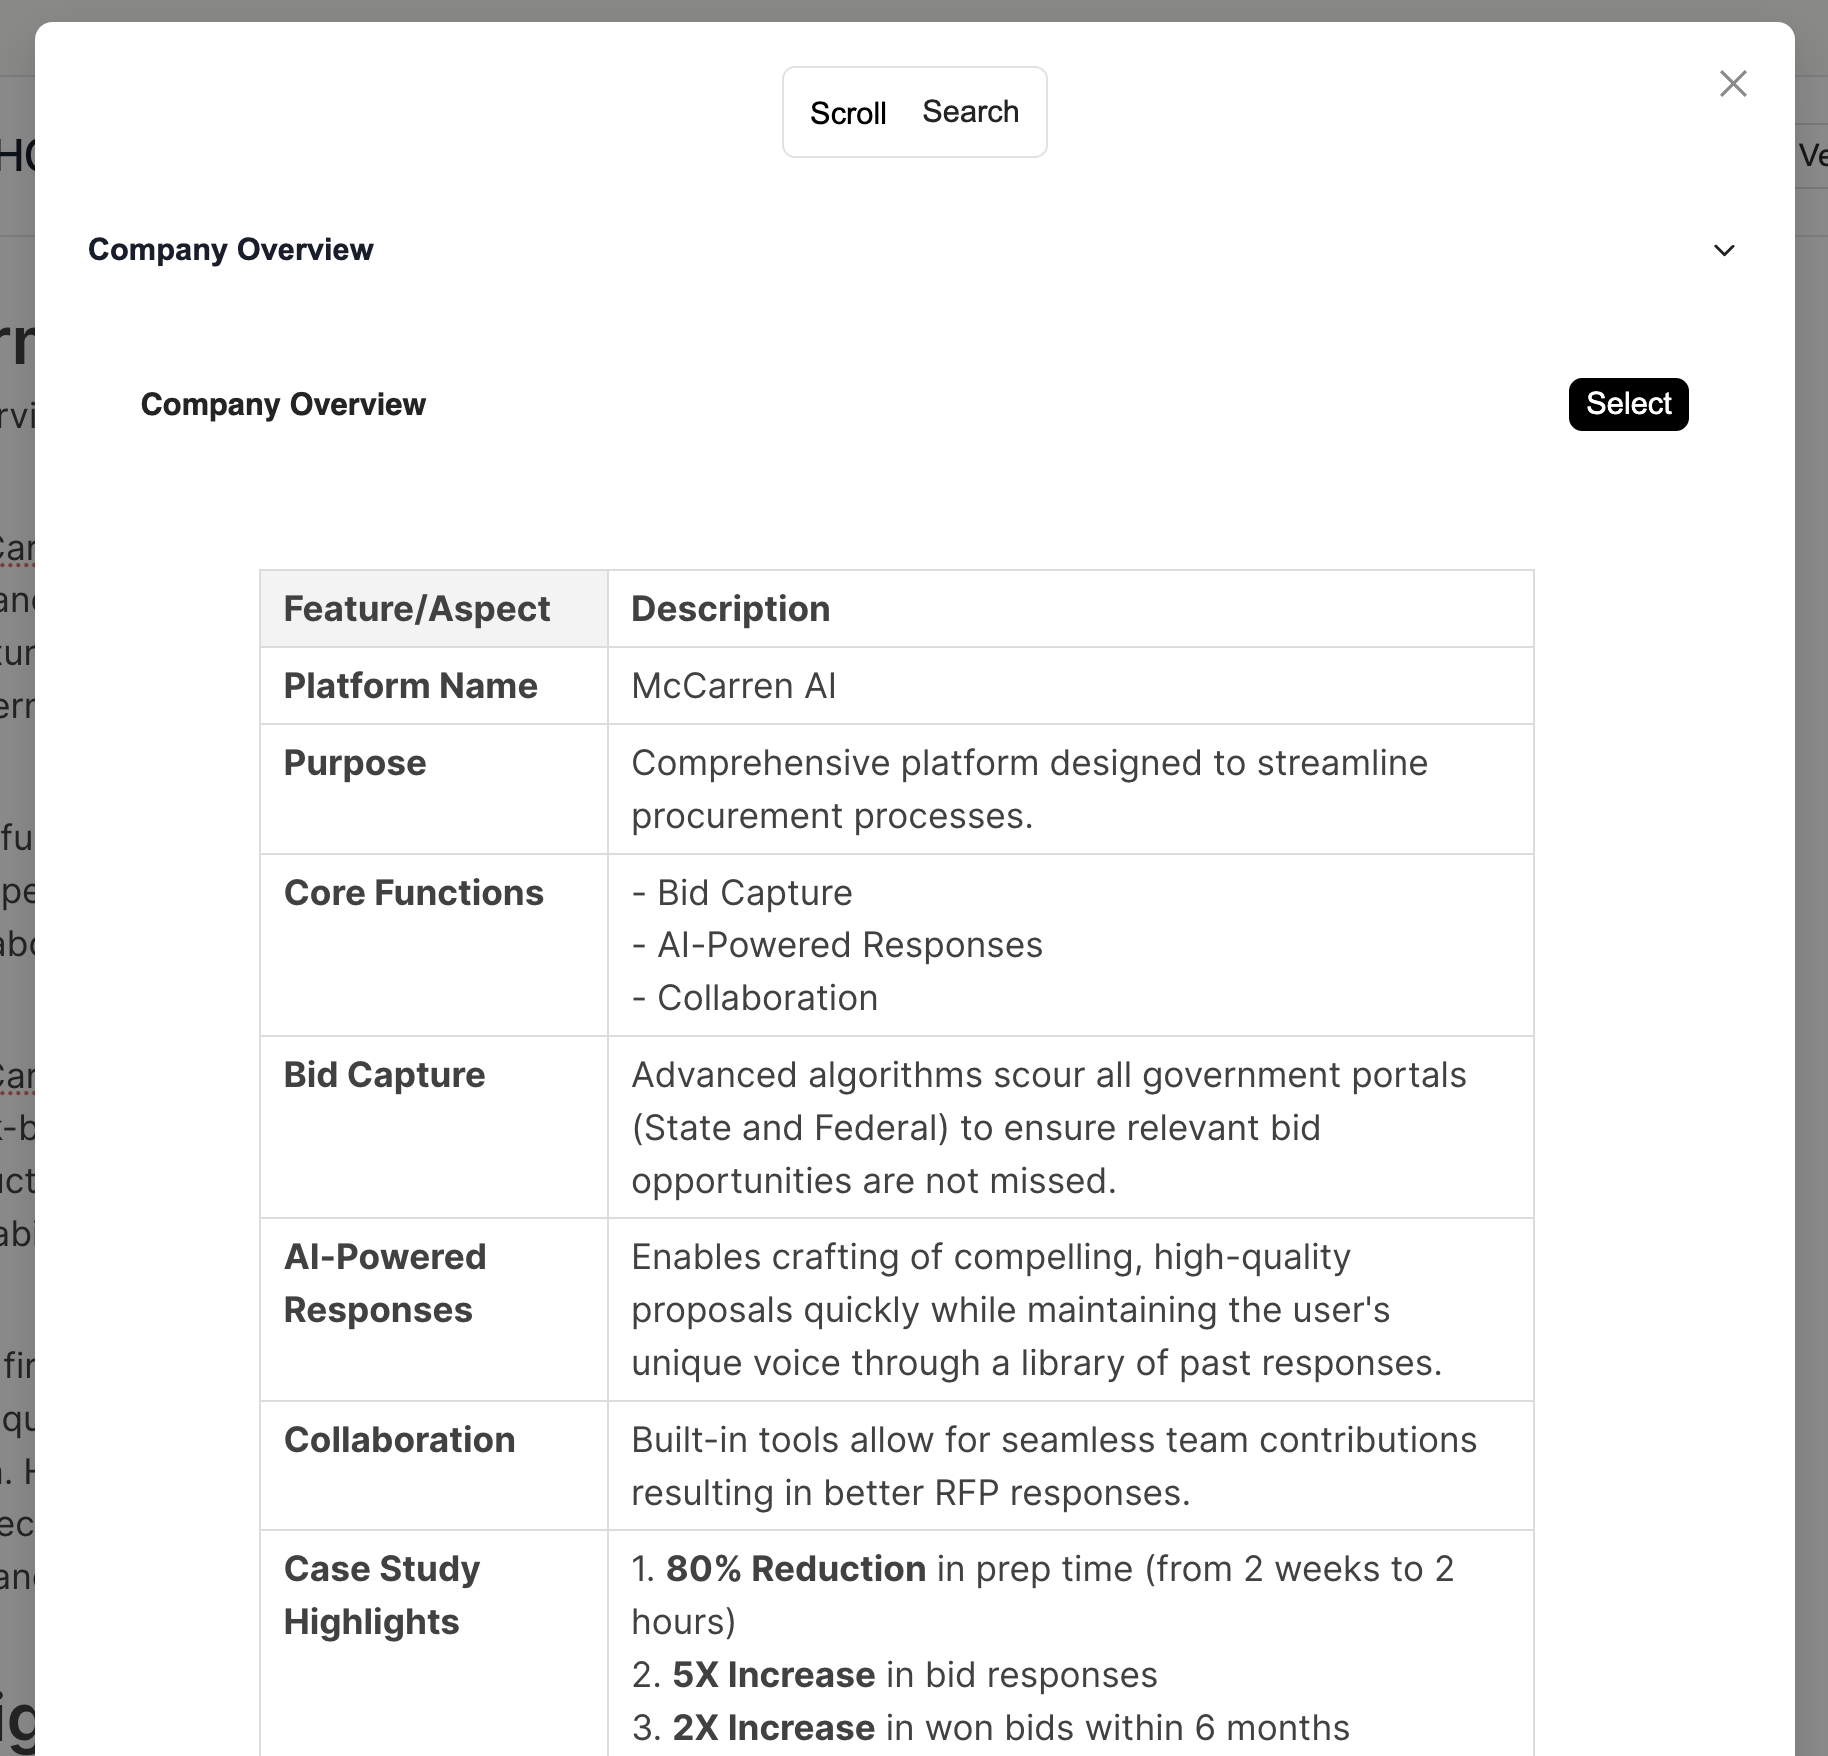
Step 4: Selecting Knowledge Sources
When you click "Build," you'll be presented with the brain selector.

Select only the information sources from your library that are relevant to this specific RFP or questionnaire. This ensures your responses will be accurate and targeted.
Step 5: Working in the Response Editor
After selecting your knowledge sources, you'll access the response editor.
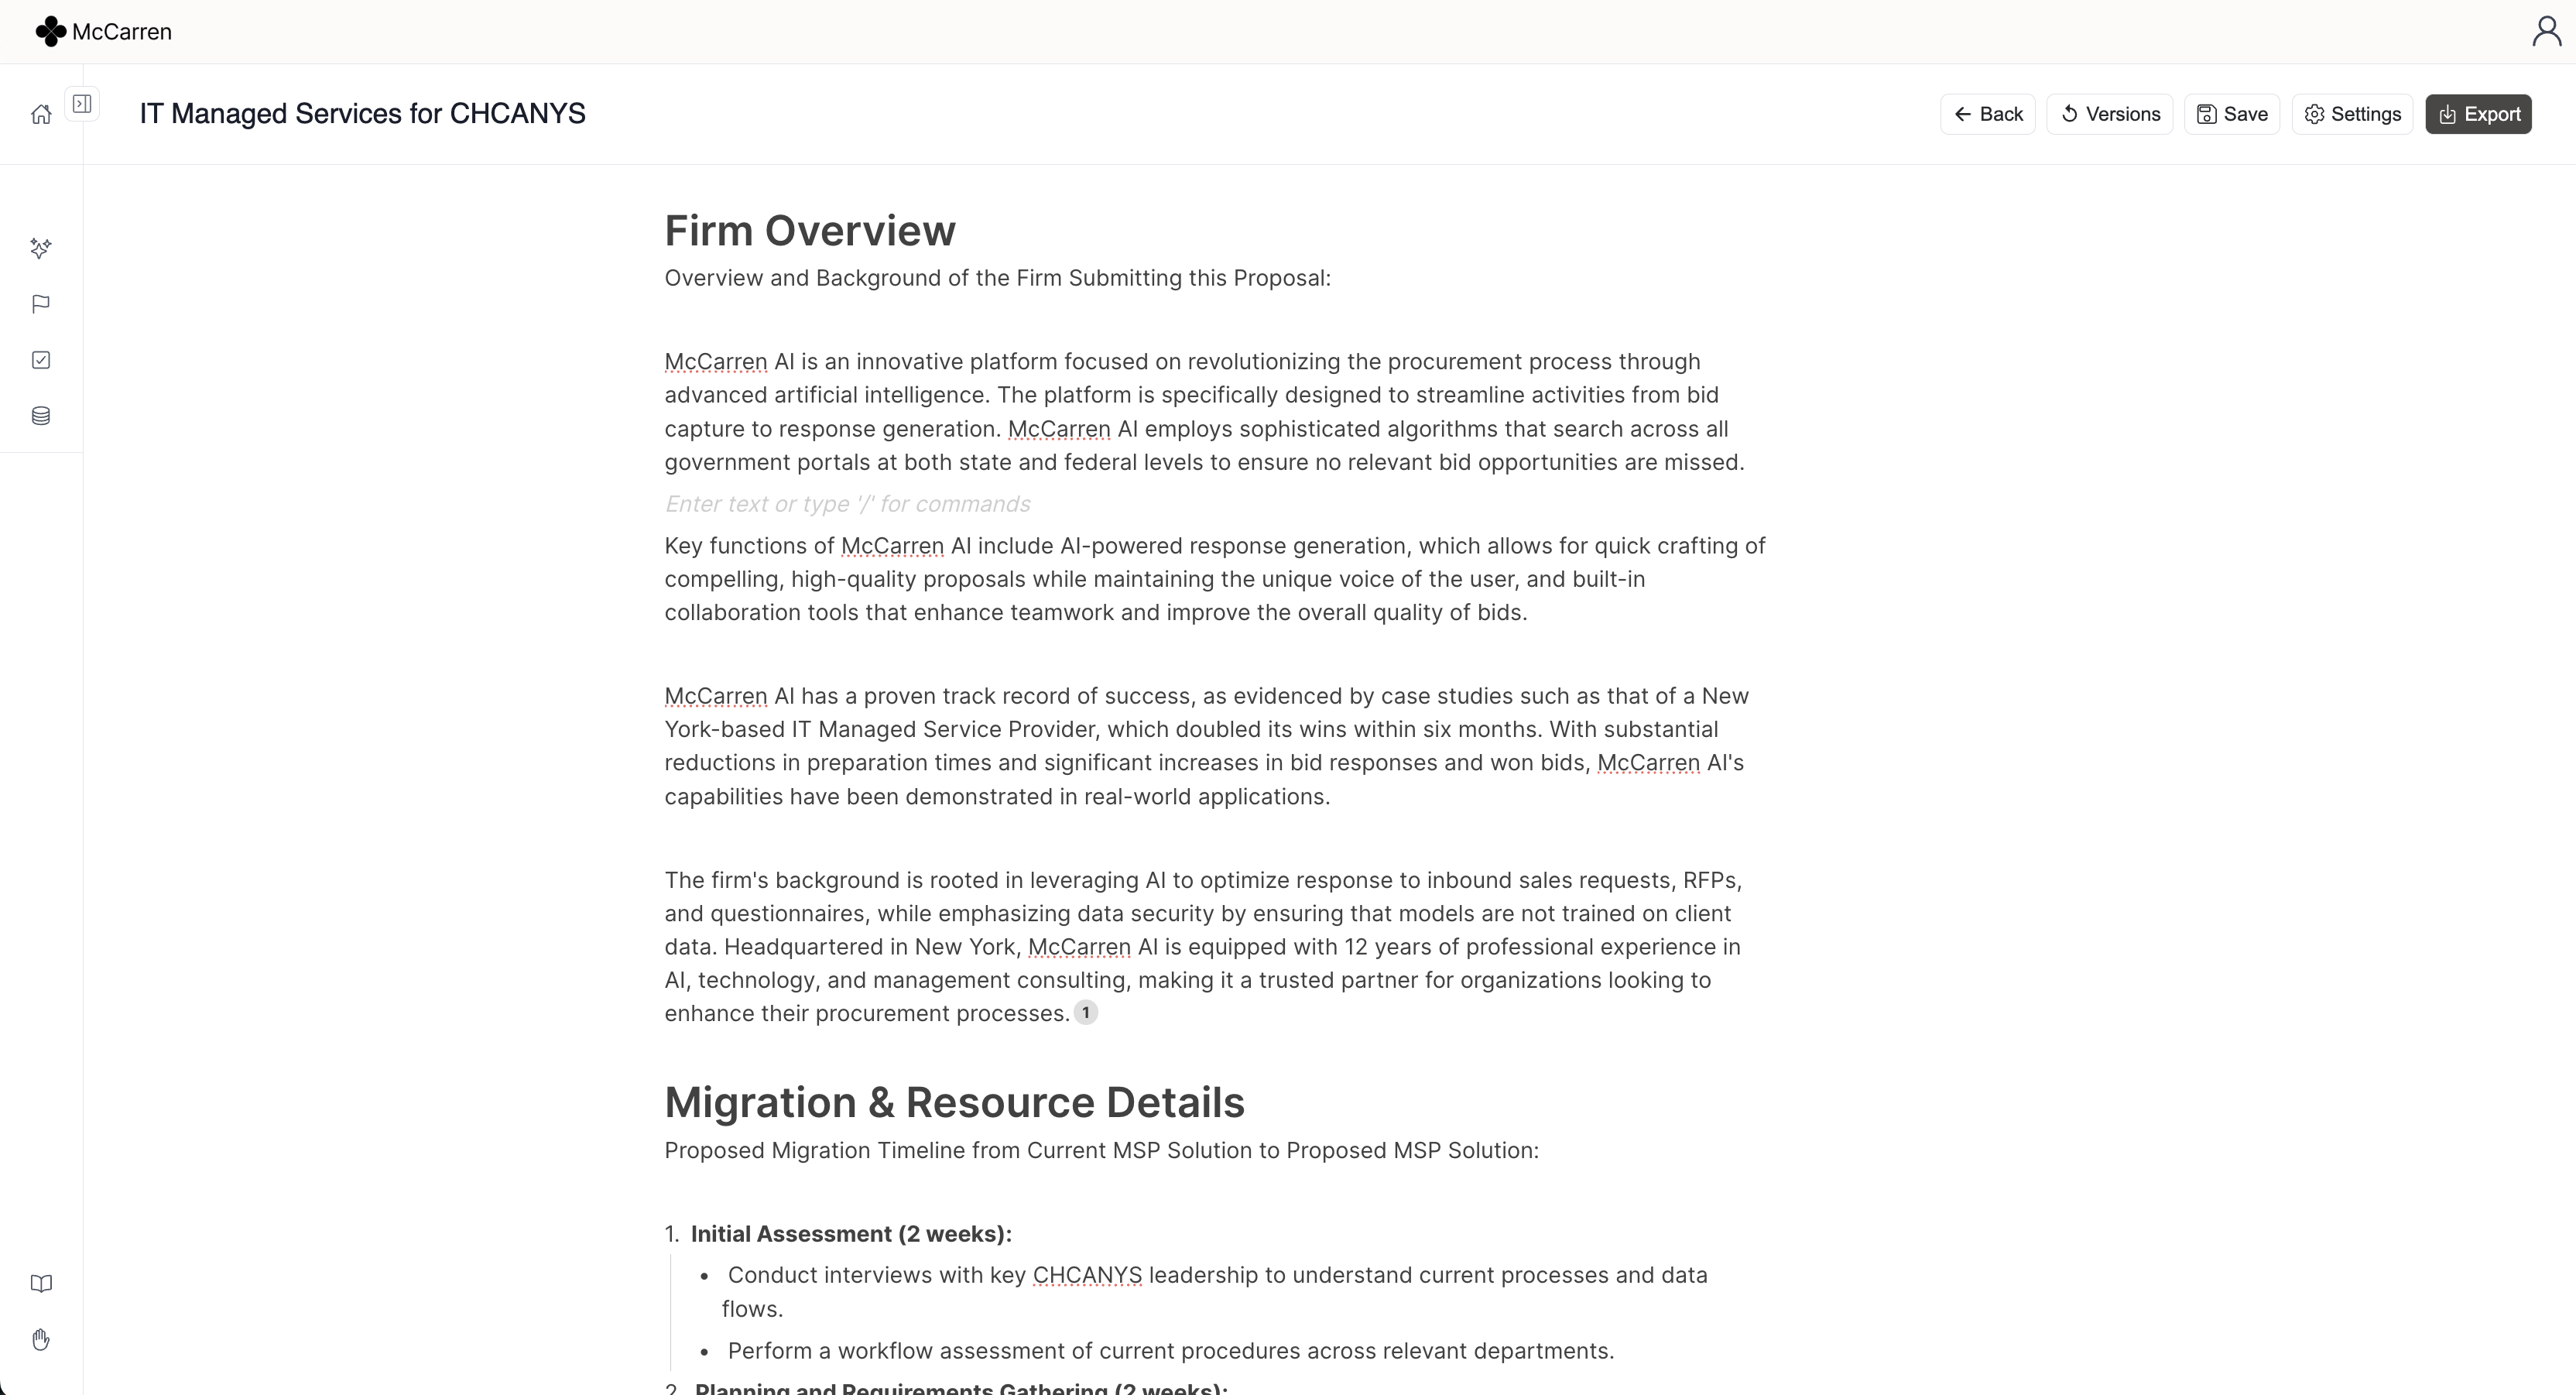
The response editor is a live text editor where you can:
- Type "/" to add new content
- Highlight text to apply formatting
- Click the six dots next to any section header to access additional options
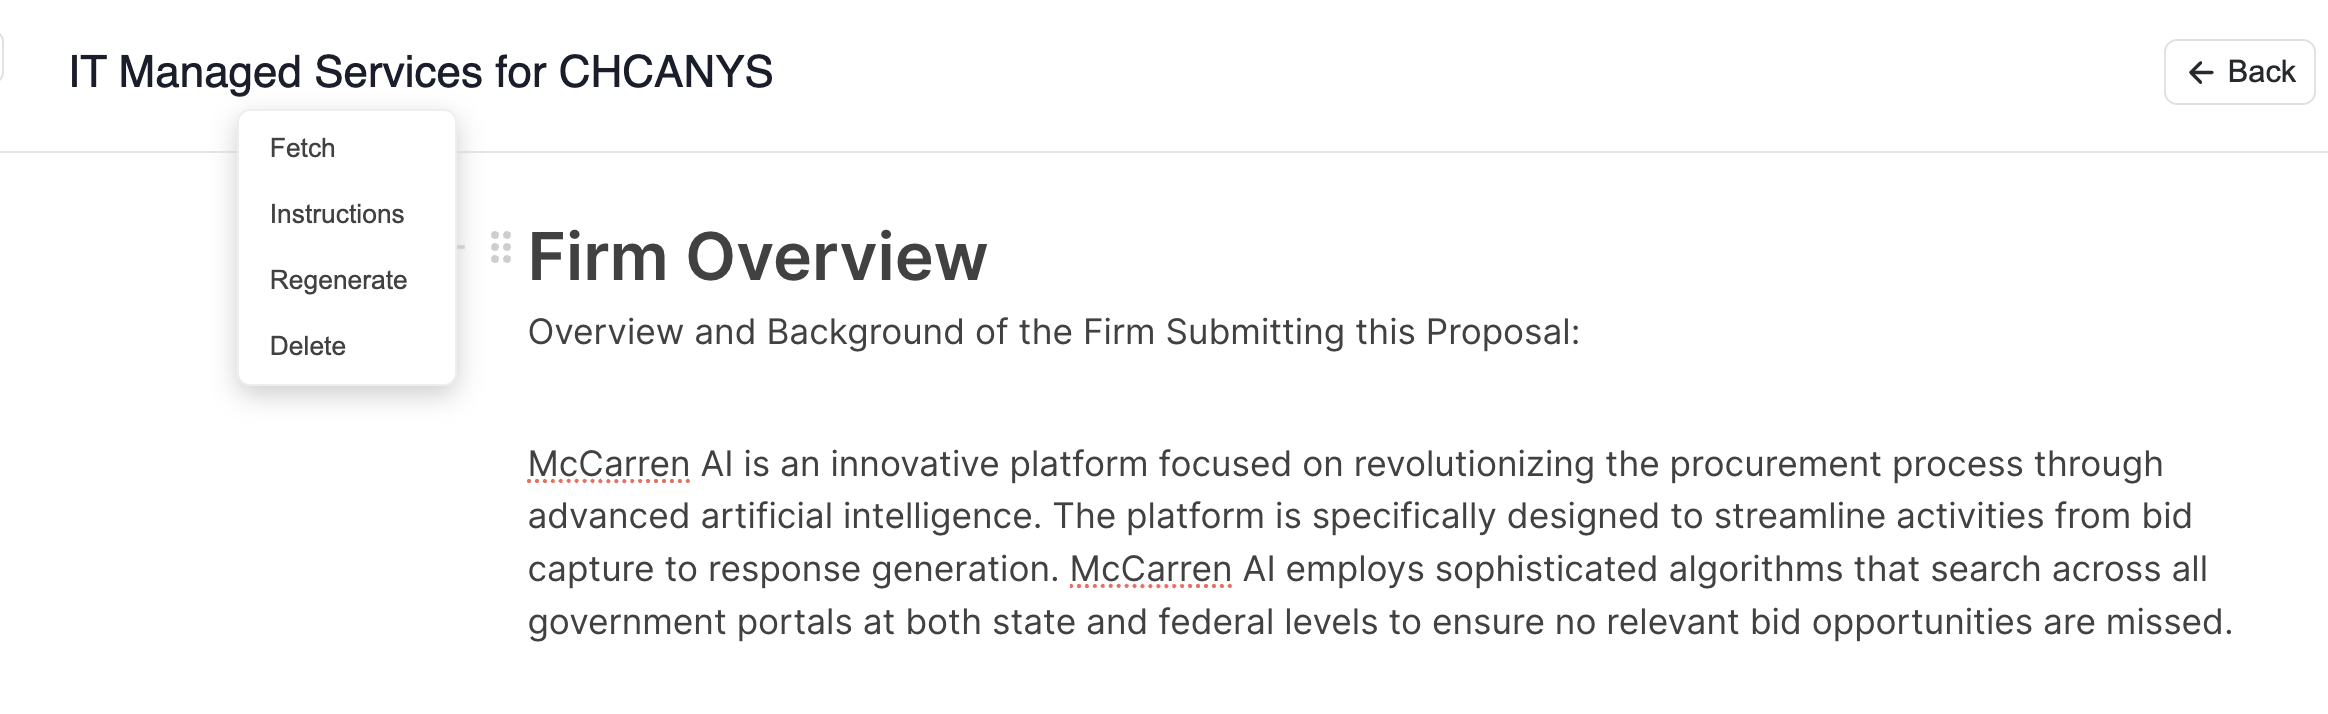
Step 6: Fetching Library Content
Use the Fetch modal to import content directly from your knowledge library.
For more details on loading data from the library, see Loading Data from the Library.
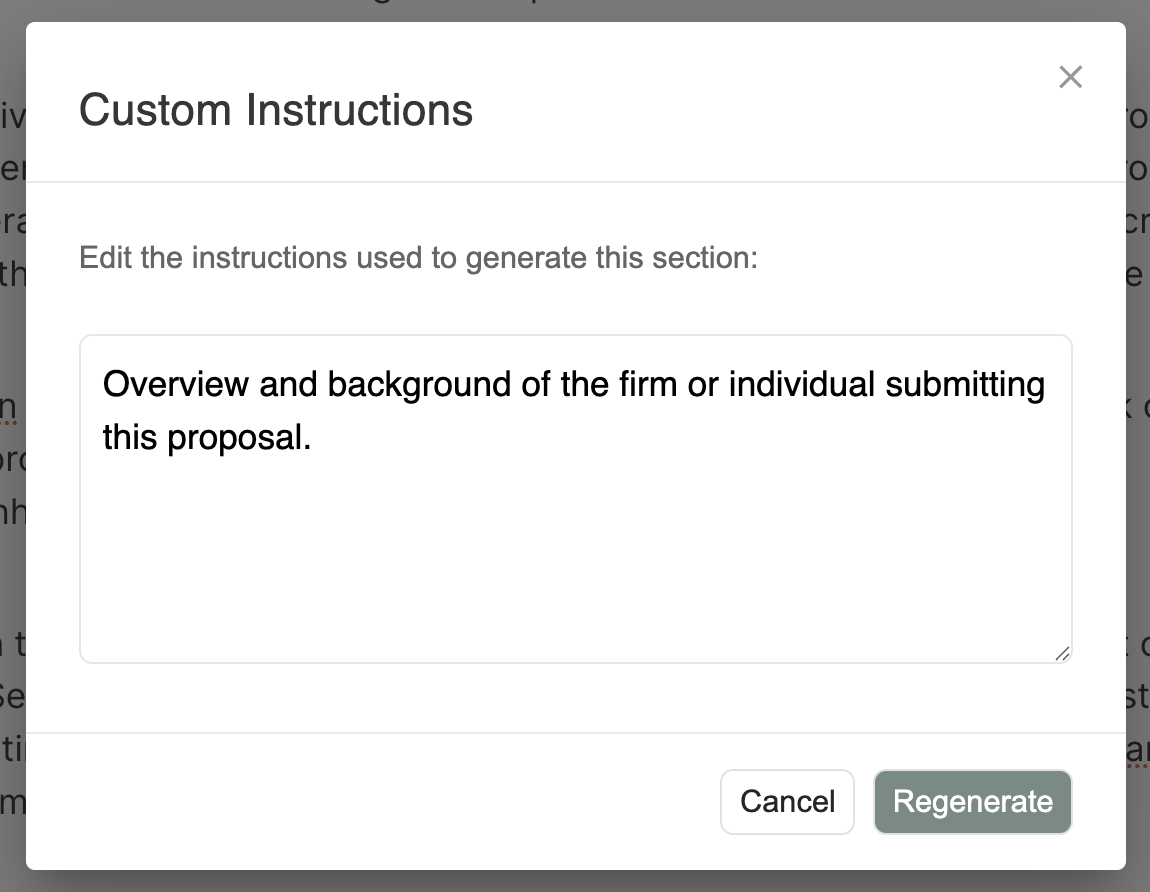
Step 7: Customizing Section Instructions
The Instructions modal allows you to edit the prompt for any section and regenerate that specific content.
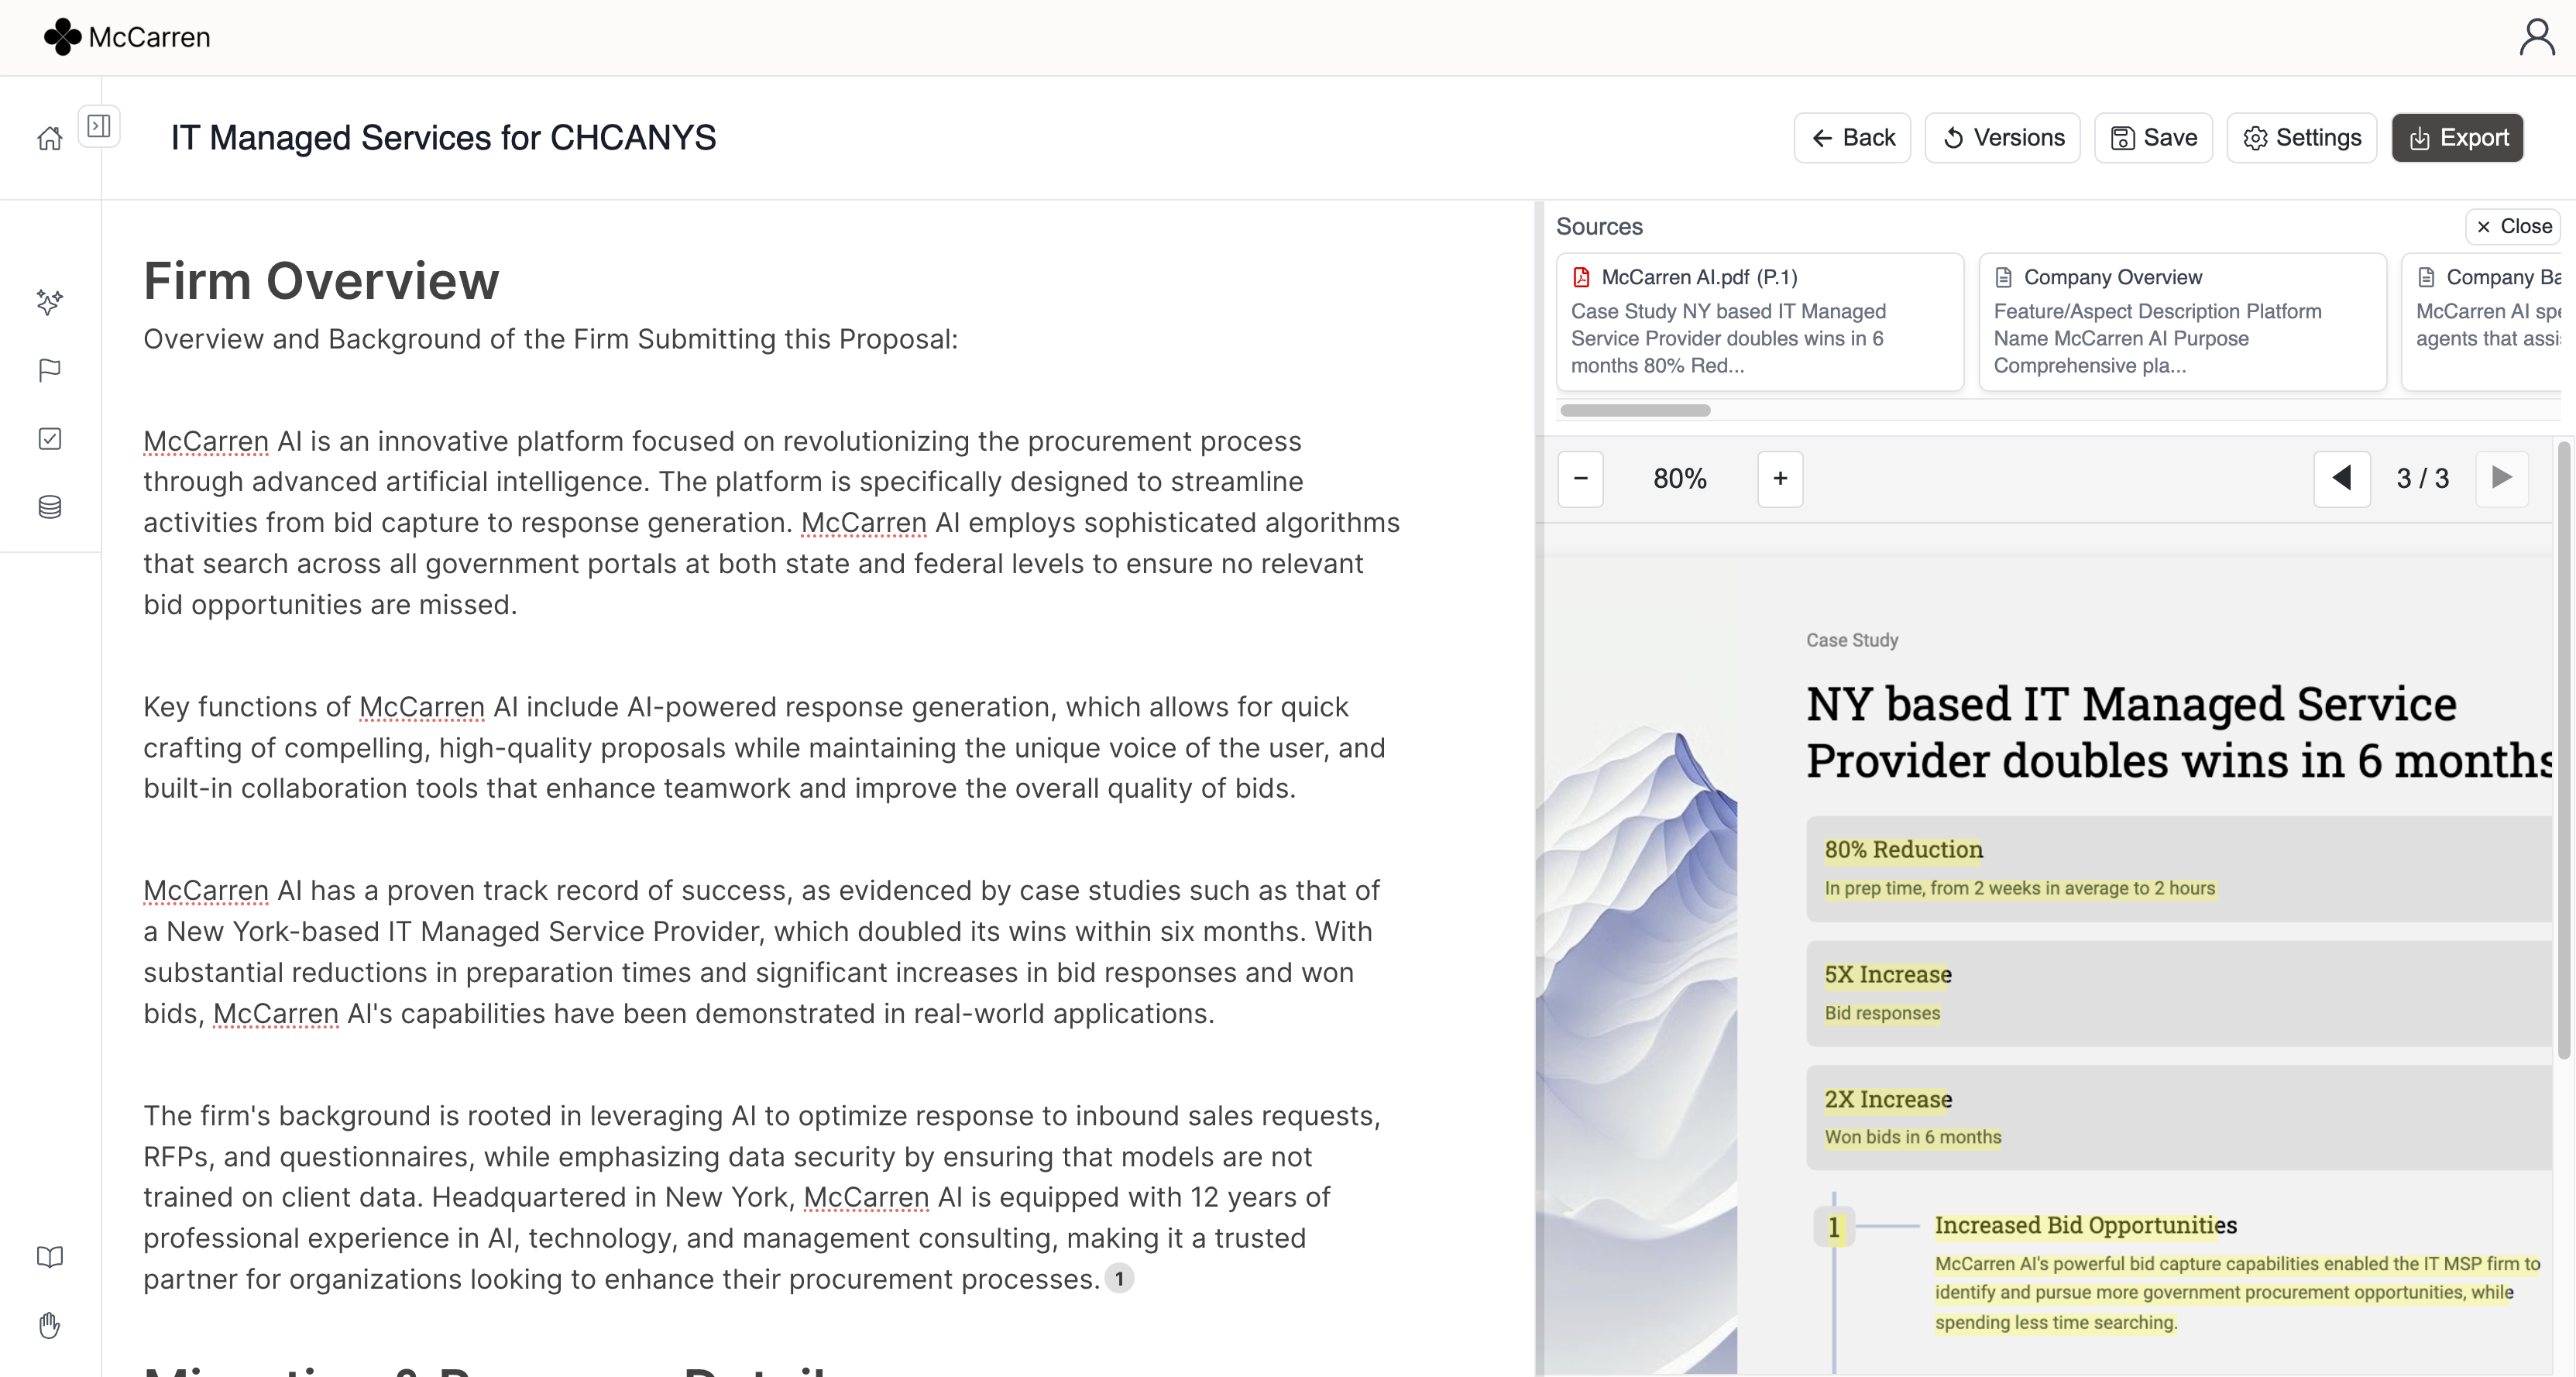
Step 8: Viewing Sources
Each section displays the sources used to generate the content. Click the source icon to see which knowledge library items were referenced.
Step 9: Exporting Your Response
When you're finished editing, click "Export" to export your response to Word, where you can continue working on it using the Word plugin.